Mon Prof Augmenté
Orienteering with map and compass
Age 15 · Sports
Open to everyone until Tuesday, November 24
To keep it, print it while it is open.
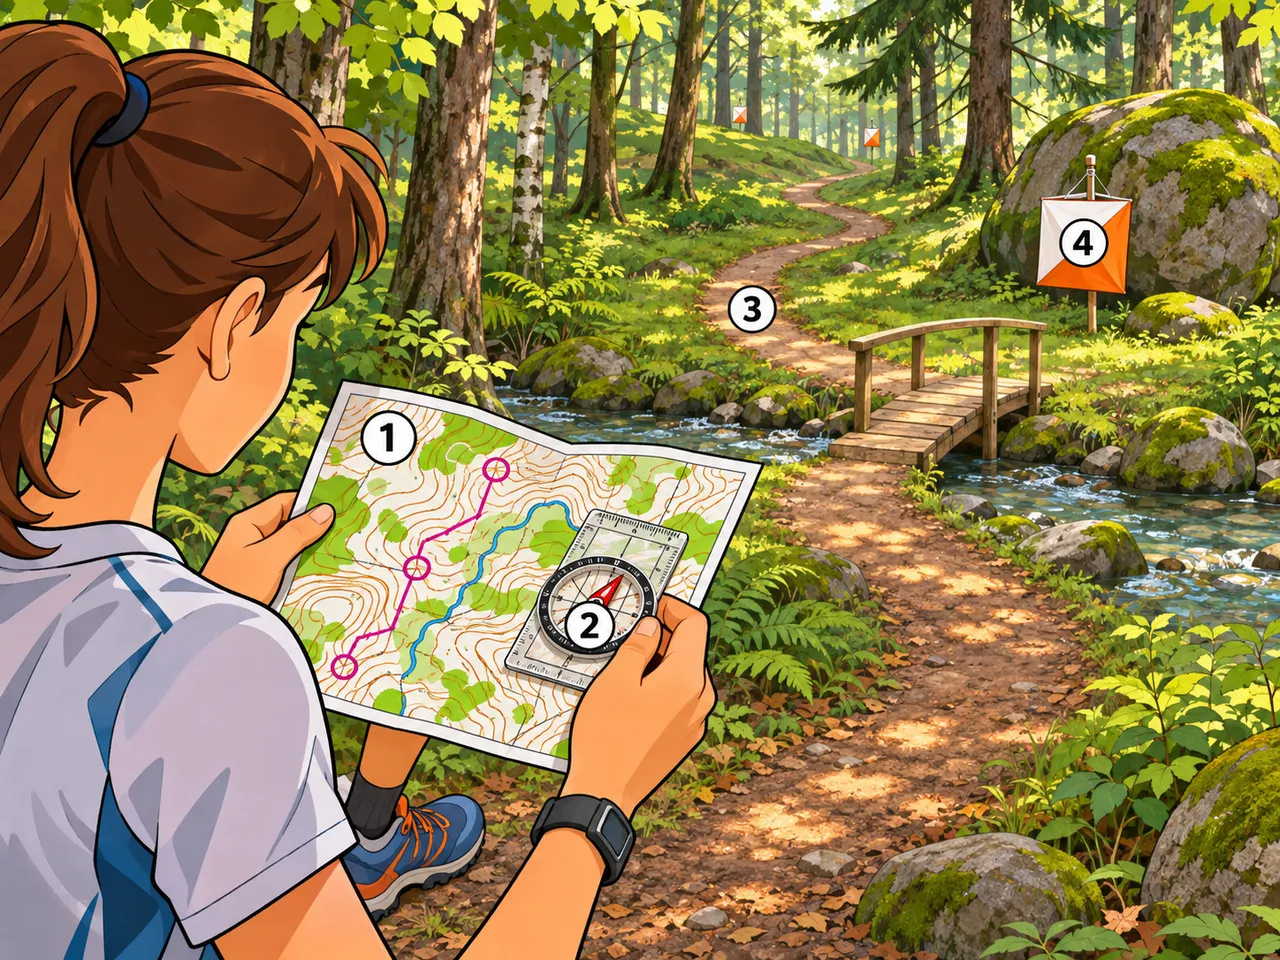
In orienteering, you use a detailed map and a compass to find control points in terrain you have never seen before. You choose your own route between them, so thinking well matters as much as running fast.
In the picture
- The map: shows hills as contour lines, plus paths, streams and vegetation
- The compass: its red needle points north, so you can turn the map to match the ground
- The route: a path and a bridge are longer but faster and safer than going straight
- The control point: an orange-and-white flag placed at a feature marked on the map
Examples
- In a school orienteering event, you follow a path to a stream junction, then use the compass to head straight to a control behind a boulder.
- On a hike, you turn your map until the lake and the hill on paper line up with the ones you see in front of you.
Key takeaways
- Always orient the map first: north on the map must face north on the ground.
- The shortest line is not always the fastest route; paths and clear landmarks often save time.
Quiz: Orienteering with map and compass (Age 15)
-
You have just picked up your map at the start of an orienteering course. What should you do first?
-
A control point is straight ahead through rough terrain, but a path leads around to it over a bridge. Why might the path be the better choice?
-
How does an orienteering map show hills?
The answers, each with its explanation, are in the app. This quiz is free there while the lesson is in the free week.
Get the app
Free app, optional subscription
App Store Google Play
Carry on in the app
At least one new illustrated lesson every weekday for your child’s year, with its quiz and a reminder at 6:15 pm.
Your child’s teacher does not use My Enhanced Teacher yet?
Tell them about it